Basic Setup Example
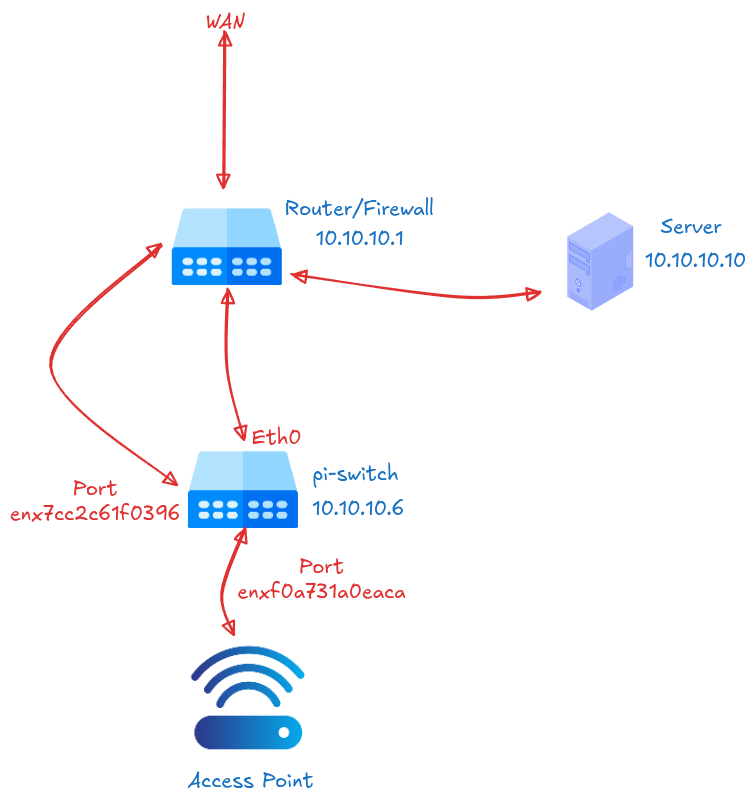
This example walks through setting up SDN Launch Control for a simple network topology using a Raspberry Pi as a switch although the installation process is largly similar between devices. Consult the diagram below to follow along. All IP Addresses and details used in the example are drawn from this diagram.
Network Topology
The final outcome of this guide will be the network seen below. The server @ 10.10.10.10 is running SDN Launch Control, the switch at 10.10.10.6 is a Raspberry Pi with 2 USB to Ethernet Adapters.
Hardware
In this example the Controller and API are running on the same server. To do this you need a minimum of 16GB of RAM.
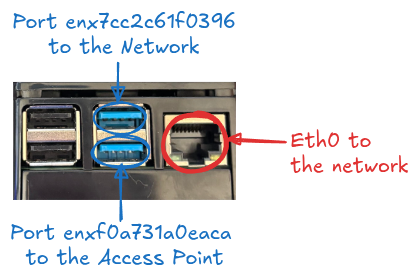
The Raspbbery Pi will be configured as follows:
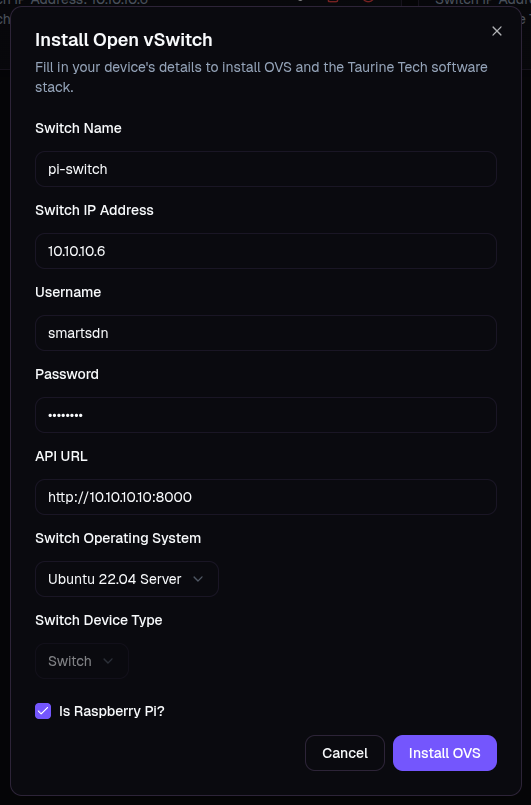
Step 1: Install Open vSwitch
-
Navigate to Switches in the UI at
http://<SERVER_IP_ADDRESS>:3000/devices/switches -
Click the + Add Switch button
-
Fill in the form, nothing the following important fields:
- API URL:
http://10.10.10.10:8000- this is the IP address of the server running SDN Launch Control. - Is Rapberry Pi?: select this if your switch is a Raspberry Pi.
- API URL:
-
Click Install OVS
The system will:
- Configure OVS on the target device
- Install Docker on the target device
- Set up a device resource management script
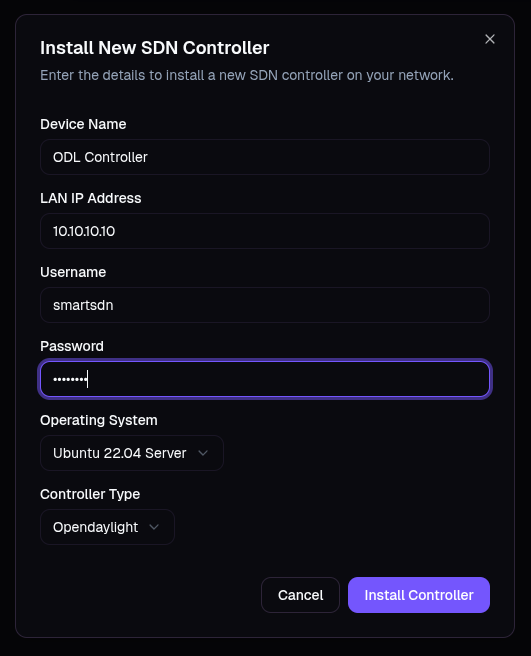
Step 2: Set Up SDN Controller
-
Navigate to Controllers in the UI at
http://<SERVER_IP_ADDRESS>:3000/devices/controllers -
Click + Install Controller
-
Fill in the form:
-
Click Install Controller
The system will:
- Install Docker on the target device
- Set up an ODL SDN Controller in a Docker container
Step 3: Create Bridge
-
Navigate to Switches → Select your switch
-
Click Add Bridge under the
Bridge Configurationsection. -
Fill in the form:
- API URL:
http://10.10.10.10:8000(your SDN Launch Control server) - Ports: Select ports connecting to access point and back to your network. Refer back to the diagrams above.
- Controller: Select the controller we set up in the step before.
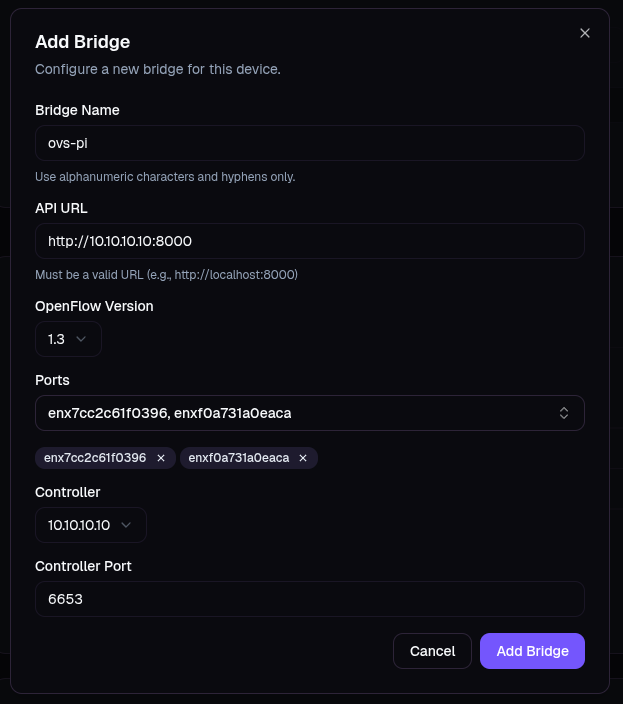
- API URL:
-
Click Add Bridge
The system will
- Configure the OVS Bridge
- Set up port and flow monitoring tools on the switch
Conclusion
Once you have done this you will have a simple network set up. You should be able to connect to the access point and use the network.
Next Steps
- Network Configuration - Advanced configuration