Advanced Network Configuration
This section focuses on advanced features such as AI-based traffic classification and notification systems. We will build on the network we set up before so ensure you have set up the network as explained in Basic Setup Example.
AI Traffic Classification
Plugins
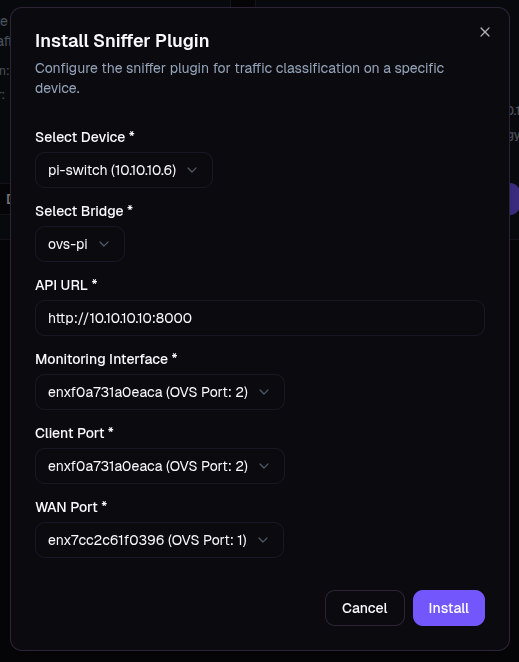
Navigate to the Plugins page from the side bar Settings > Plugins. You will see the two options. Click the install button for the Opendaylight Traffic Classification Plugin first and accept the prompt to install the plugin. Once this is installed, install the Traffic Classification Sniffer plugin on the switch.
- API URL:
http://10.10.10.10:8000(your SDN Launch Control server) - Monitoring Interface and Client Port: the name of the port connected to your AP. If you have configured your switch as per the instructions in the Basic Setup Example then this will typically have the higher integer value for its port number. Therefore, the port to the client is port 2 (or the higher port number if you don't have ports number 1 and 2).
- WAN Port: the port to WAN is port 1 (or the lower port number if you don't have ports number 1 and 2) as per the Basic Setup Example.
Setting Up Traffic Shaping with AI and Opendaylight
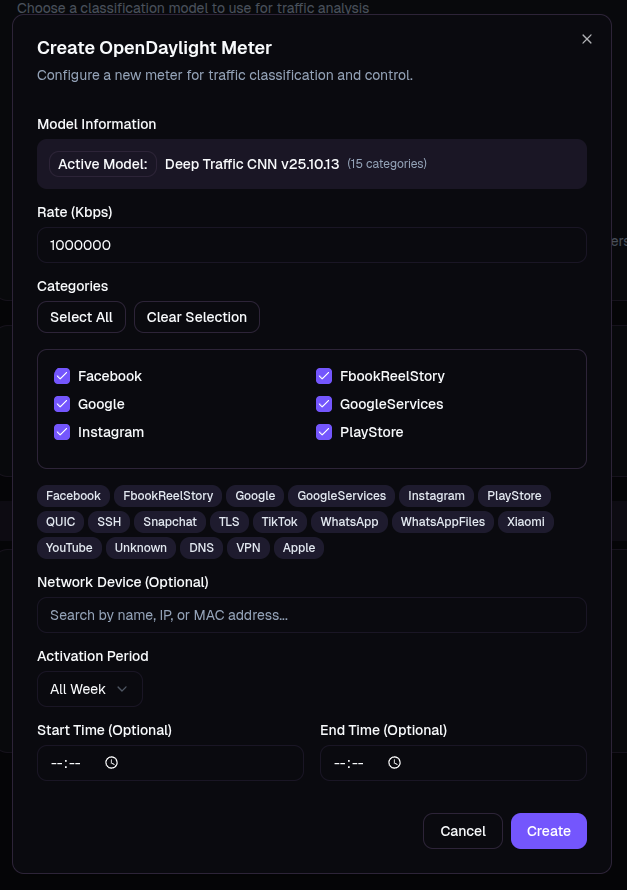
Navigate to the Traffic Classification Rules page using the sidebar: AI Services > Traffic Classification Plugin. On this page you will see the meter entries for your switch and controller combination. To create one click Add Meter. Here you can set up rate limiters for different applications. Note you can assign more than one traffic class per meter. You can also assign a device to the meter meaning that particular user will have a rule that applies to them specifically. There are also time options to add more granularity to your rules.
Every meter entry you create will allow you to monitor the amount of data consumed by that class of traffic and monitor the data consumed by users. Any bandwidth you see consumed by Unallocated Traffic in the monitoring dashboard is traffic that does not have a meter to manage it. For this reason it is recommended you create a meter for every traffic category even if you don’t want to limit the traffic. You can set the rate to an arbitrarily high value if you don’t want the meter to influence this traffic but you still wish to monitor it.
Notifications
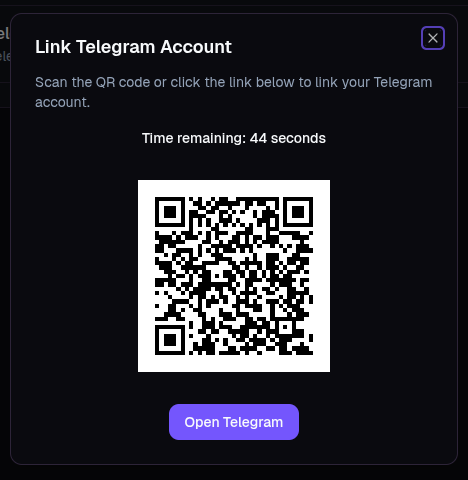
Users can link their Telegram account to their Launch Control account to enable notifications about bandwidth consumption and network summaries. Navigate to your profile page by clicking on the profile icon in the bottom right corner of the page and selecting the Settings option in the menu. Once you are on this page select the Telegram tab.
Here you can link your Telegram account by clicking the Link Telegram Account button. This will bring up a dialogue that displays a QR code that is only valid for 45 seconds. Ensure you have installed Telegram on your phone, have set up an account and then scan this code with your phone’s camera. This will automatically open Telegram and prompt you to start a chat with the Launch Control bot. Start this chat and you should receive a message from the bot confirming your account was linked.
Once you have linked your account navigate to the notifications page from the sidebar menu: Settings > Notifications. Here you can set up notifications based on network activity or receive general network summary notifications.
Next Steps
- Architecture Guide - System architecture